Showing posts with label organizing. Show all posts

Thursday, July 9, 2020

Konnichiwa Paper Bag Album and a Challenge for July

Hi there!
How are you all doing? last week was a bit of an eye opener for me, well sort of. I knew my paper crafting stuff was out of control but it was confirmed when a shelf fell in my craft room. Thankfully my kids and I had just left the room because the crash that followed made us all jump out of our skin!


That empty yellow space was where the shelf was.


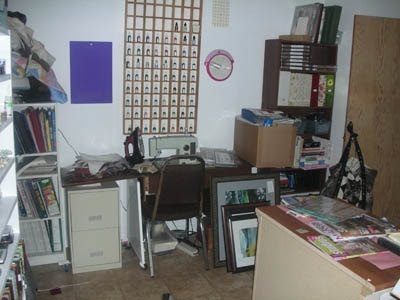
My sewing space is such a mess, yikes!

So now begins the task of dealing with the stuff. As I was going through the things that fell I came across many unfinished projects which led me to my July challenge....FINISH THEM!

In this video I walk you through a paper bag album I just finished and what my plans are for the projects for the rest of this month. Enjoy and feel free to join me if this sounds familiar, haha.


Another thing that I need to deal with is my embellishments that I was going to reorganize and now that the shelf they were on is gone, it's time. They are currently sitting on my workspace which is convenient but not ideal.


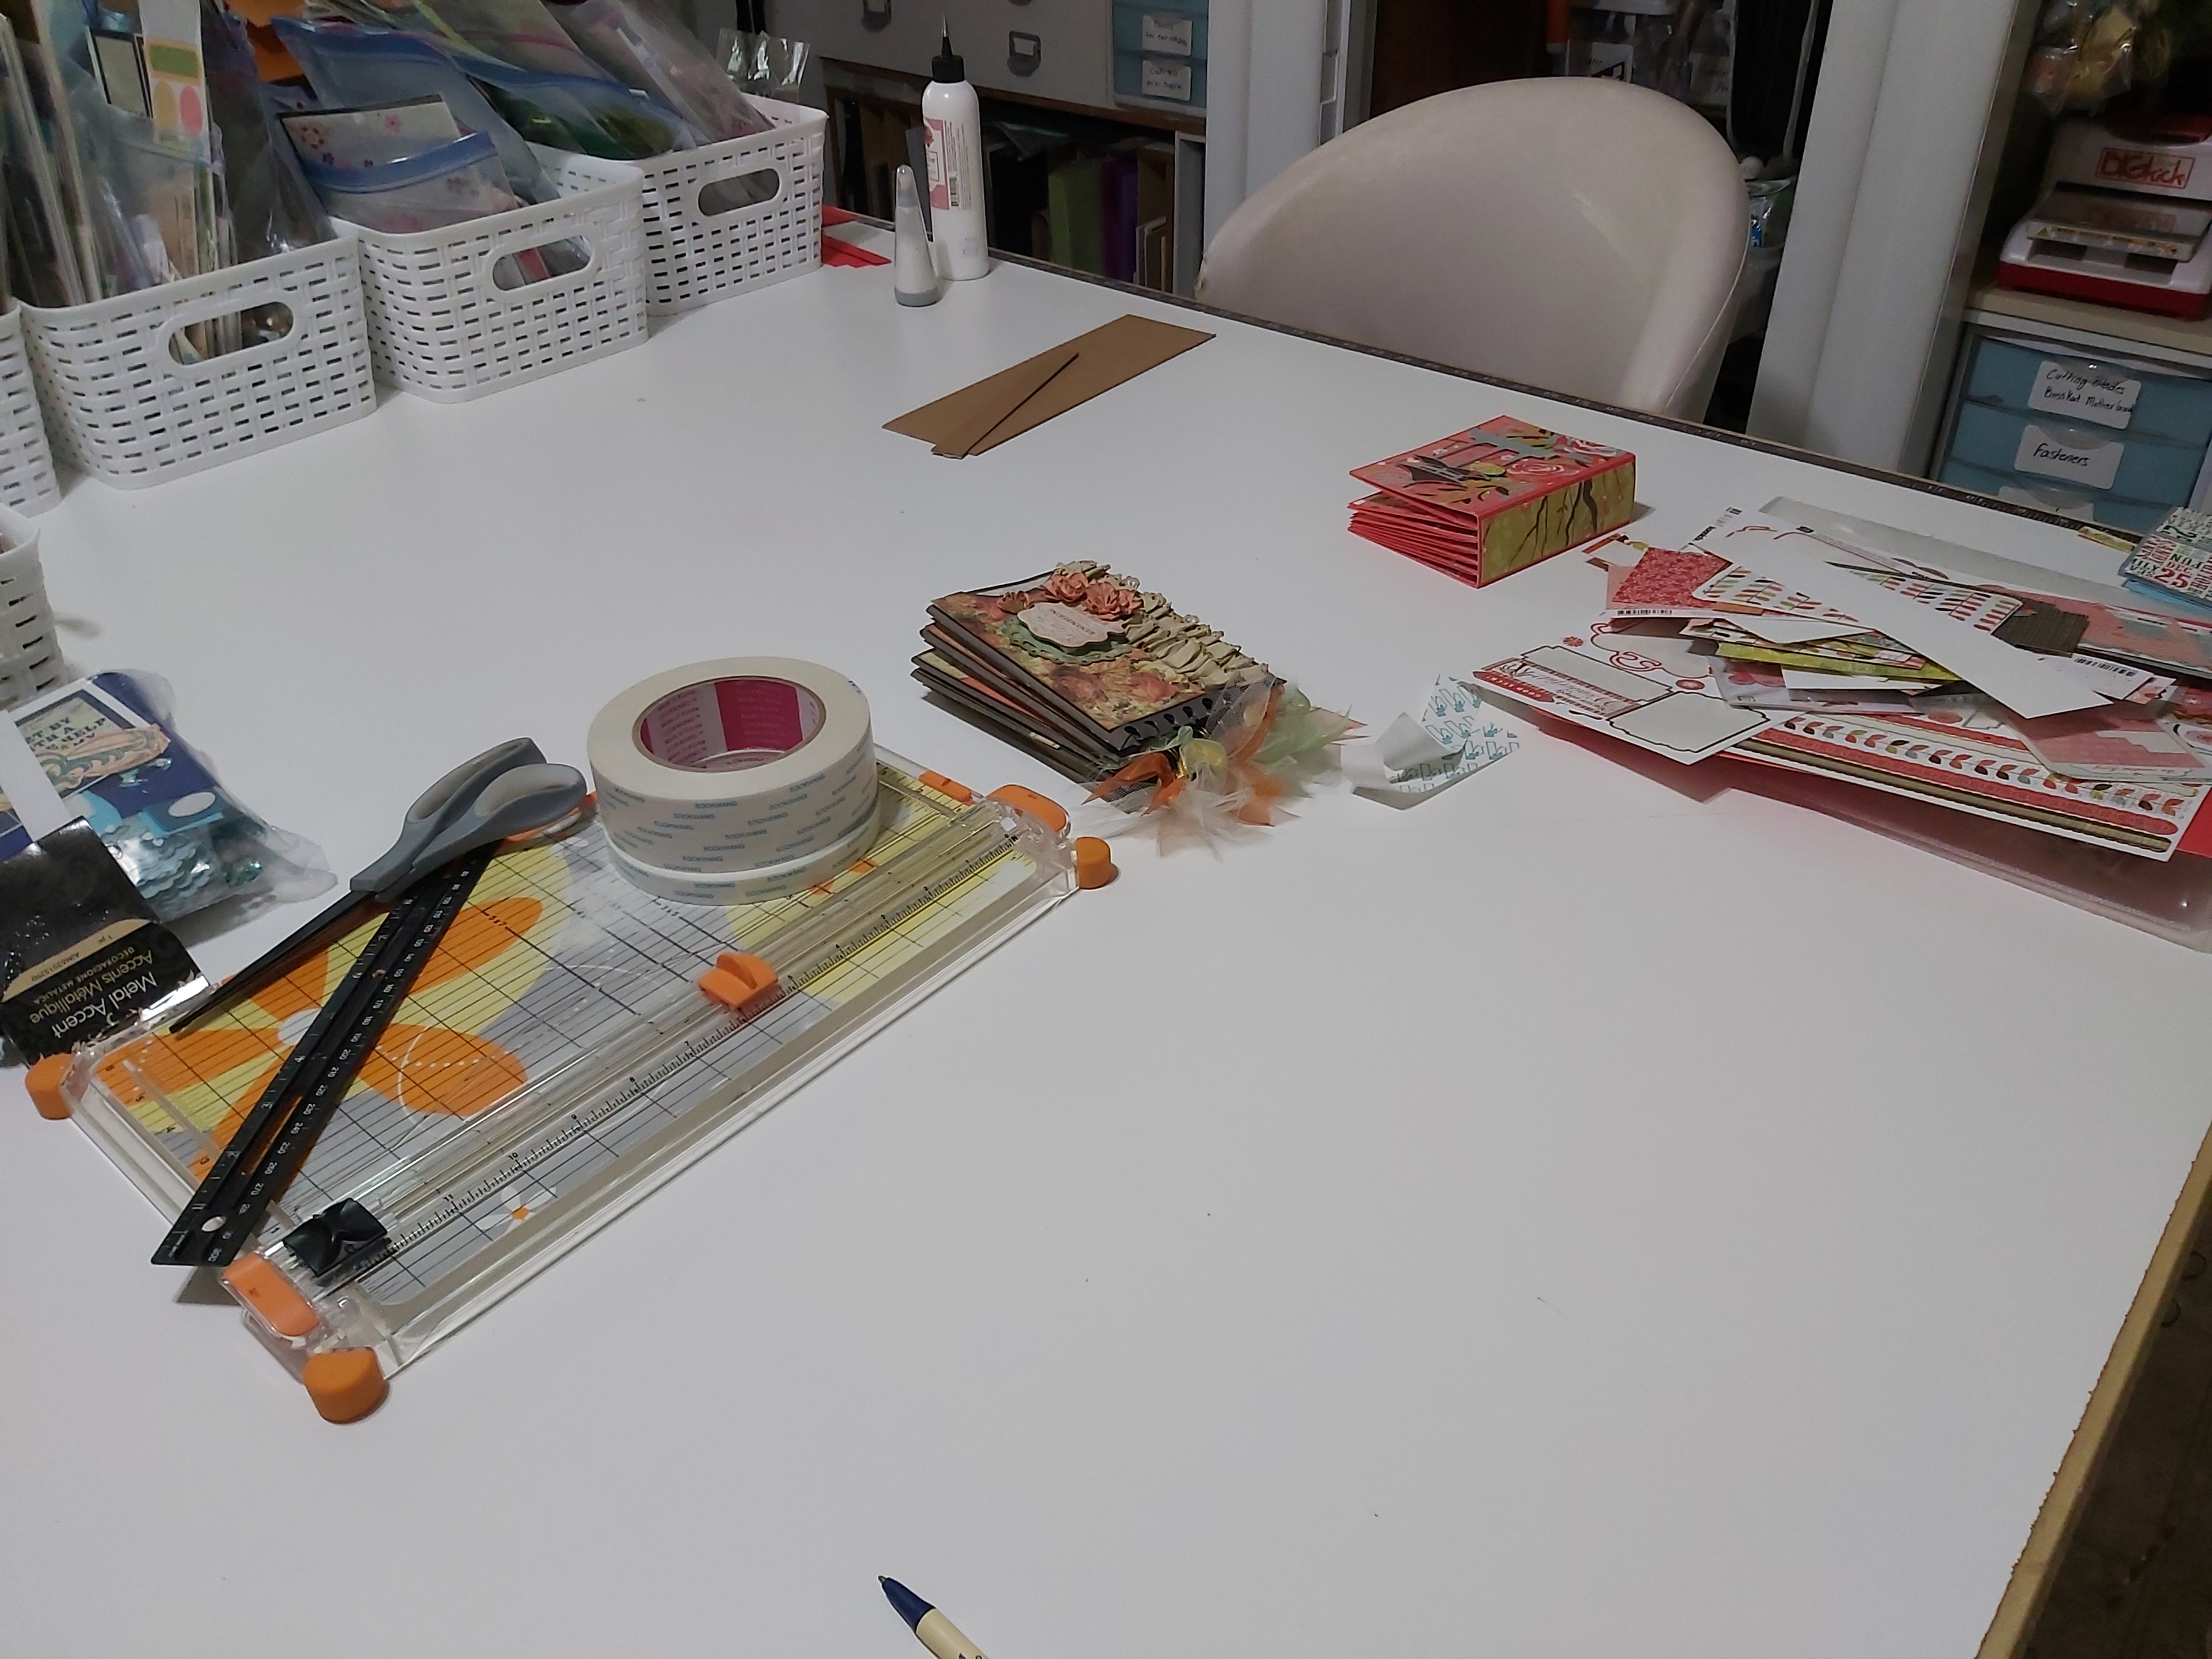
Here are some more pictures of the chaos that has been somewhat sorted.


Thursday, April 21, 2016

Embossing Folder Storage Using the Fuse Tool


Here is a video I created showing how you can store multiple embossing folders using one 12"x 12" page protector for the base and a few others for pockets using the Fuse Tool. If you are like me you get a little carried away with buying these wonderful things and run out of storage space for them. You can fit up to 24 folders on one page protector! Also use this method to get those thin dies in order along with stencils. Larger stencils can fit in the center pocket!

Saturday, March 19, 2016

Where Have I put My Flowers? Check This Out!

Just before Christmas I scored this really cool item from a local shop called Patina Floor and Decor in Warman, SK, Canada. They have some pretty unique items in their shop. At first I used this rotating bin for our Christmas candies, lining each bin with parchment paper to keep it clean. My original goal for this though was to store my paper crafting flowers. Although I really don't have room in my space for it I found a way to make it work because who could not want this in their craft room right?


Tuesday, May 5, 2015

Getting Ready For The Next Craft Sale......

I thought I'd post over the next few weeks about what I do to get ready for a sale and maybe share some helpful ideas I've found over the internet that have helped me prepare. I am a procrastinator, I admit it! I don't know why, maybe it's the rush of getting stuff done just before a deadline. I really hate the stress of it, which does make me want to change the way I do things and it IS slowly getting better. 

The first thing that I do is figure out what I want to sell. I make a list. For example:

Cards
Mini Albums
Table Runners 
Cup Cozies
Coasters
Paintings
Quilts

Then I check my inventory to see how many of the items I have already and prioritize what needs to get done first. I look at the list and then determine how many of each category and how many different types of each item I need to make . A lot of times I'm over ambitious with my numbers but it does help me stay focused. As a crafty person one craft usually fuels ideas for the next and it can easily turn into a ridiculously huge amount of stuff to try and get done. Try to be realistic in how much time you have to accomplish everything and how long it takes you to do something. I have a bad habit of thinking I can do more in a day than I actually can. I then write down a lower number than I think I'll get done. If there is time you can always do more.

This is what it looks like when I don't stick to the plan. CHAOS! Now I have to clean up.

Next is gathering supplies. It's very easy to jump right in and start creating only to find out you don't have what you need to finish and unless you live really close to a craft supply store this is going to take time out of your crafting to run around and find what you need. The best way I've found is to make a recipe of the item you wish to make and then a shopping list. You can file the recipe away in case sales are good and you get a request to do more or just for your own files. It also helps you keep track of costs so you know what to charge for your finished item. I like to use craftybase for keeping track of the supplies, recipes and it also has a great format for calculating what you should charge for handmade items. The initial entering of items can be tedious but in the end it saves a lot of book work and keeping track. They have a 30 day trial period and then if you like it you can subscribe monthly. You can determine if your overall sales in a month can justify the extra cost of the program. I have an Etsy shop where I sell all year round so for me I think it's a good investment.

Getting things done 

If you are like me there are other things that need my attention (laundry, meals, groceries, or just plain life) so keeping things organized is key. I am not the best at this step but when I do get it right things go so much more smoothly and I get a lot accomplished. Breaking up your projects into steps can help you get more than one item done at a time. For instance when I make my cards, I've started making up kits with all the supplies each card needs in one kit. So one day I'll spend brainstorming ideas for cards and then gathering the supplies I need for each kit. I make 6 cards of each design so I make sure I have enough in the kit for 6 cards. When I have time to make a set I'll take out the kit and put the cards together in the steps below.

1.Cut all card bases
2.Cut the background pattern paper for all cards
3.Stamp or print images and greetings for cards
4.Punch or die cut shapes
5.Ink all edges
6.Adhere background paper to base
7.Arrange and adhere images and embellishments to cards
8.Add greeting or inscription to the inside

I do the same for quilted items, I make kits by spending one day cutting and packaging and then sew in steps. I don't work on more than one at a time so that I don't get confused but I may work on it until a step is finished and then pack it away for the next available time. One thing I have found to help me the most is to put everything away at the end of the day. I've tried to leave stuff out to continue the next day but I find it very overwhelming and there is just something appealing about walking into a clean space the next day. If you've stopped a project at a certain step it's very easy to pick up where you left off. Just don't leave it so long you forget what the project was.


These are just the things that I find help me stay organized and focused, everyone is different in how they do things but if you do struggle like me, give these things a try it might help :)

~Jen~

Monday, September 2, 2013

Thin Die Storage

Today I wanted to share with you how I store my thin dies like Spellbinders, Cheery Lynn, MFT and Hot Off the Press.

Supplies:
-zippered binder, the thickness will depend on how many dies you have. Inside pockets are good for storing accessories.
-8 1/2"x 11" magnetic sheets ( I bought mine from Walmart in the craft isle)
-8 1/2"x 11" chipboard ( I used 12"x12" black chipboard from Grafix cut down)
-something to punch holes through the magnet and chipboard (I used my Cinch)
-plastic page dividers (Walmart again, office supply isle)

Adhere magnetic sheets to both sides of the chipboard. Mark the holes using the page dividers as a template for placement. Punch holes one at a time using whatever you have to get through the chipboard (you may have to use the old eyelet setter and a hammer) If you are using the Crop-o-dile you may have to punch several holes to get them big enough for the rings in the binder.

That's all there is to it. Make as many pages as you need to fit your collection.

Here is a video showing how I make mine :)


Monday, February 25, 2013

Storage Solution-Embossing Folders


Over the years I have collected quite a few embossing folders and gone through changes as to how I store them. This is my current storage. Hope it helps :)


Tuesday, February 19, 2013

Craft Room Reveal....finally!

Well I finally got it done (at least as far as I'm going to right now). After starting to paint in the beginning of January till now the room is finally ready to show. There are a few things that I still find cluttered and an eye sore but those things will have to wait a little longer. I want to get back to crafting so I am declaring it done!


Here is a video tour of the room broken down into the areas I have for each hobby and it's supplies


Part 1


Part 2


Friday, February 15, 2013

What Am I Doing Today?

After trying once to film a video tour of my craft room I decided I didn't like the way my magazines were looking on the shelf. I had many magazine file holders but they were all mismatched and still looked messy and cluttered to me so this is the project I'm tackling today. I'm covering the existing Staples file holders with fabric and then I will use one as a template and make a few more to hold all the books and magazines. Kind of daunting but the two I finished look great!


Wednesday, January 16, 2013

Craft Room Sneak Peek

Crafting has been put on hold for a bit as the days that I feel better (still effects from the flu) I have been getting my craft room painted. I'm eager to get my stuff back in and start crafting again. Here is a little sneak peek of the room which hasn't been easy to paint. I'm painting over walls that should be just ripped out and redone and painting over varnished trim still from the 1950's I'm sure. So far I'm liking how its looking and in the end I hope to have a bright cheery place to create.


This picture shows a bit of the trim before its painted and further in the distance you can see the closet trim that's getting a crisp white makeover.

Tuesday, January 8, 2013

Thwarted Plans

The last three days have been utterly frustrating for me as I had this whole outline of keeping up with my blog, being creative and getting projects done. I felt as if I had gotten off to a great start. As Friday morning dawned, I did not. I had been totally clobbered by the flu bug, leaving me totally helpless to even try to get out of bed, hence no Friday scrapbooking post. So I gave in to the knowledge that nothing would get done on this day. Usually the next day after being sick I feel weak but not helpless but again the nasty bug wins making me bed ridden all of Saturday. Okay so I'm sure the next day will be better, I'll be able to at least get out of bed but no somewhere in the night a giant elephant came to sit on my chest and used a jackhammer on my head. Today I was determined to get out of bed and try to function normally but yet again the bug wins. This time making me feel like I'm going to faint every five minutes. So back to bed I go. At least my brain hasn't been taken hostage and I can at least have a clear  head (sort of).  I am determined to post what I had planned today regardless of how I feel anyway.

Even though most Mondays are my "get things back on track after the weekend day", today I haven't succeeded in getting too much back in order. And now before I get into how I organize stuff I wanted to share about my craft room. I've had several posts on reorganizing it in the past and since I made it into a temporary guest room recently and had to clean almost everything out of it, I decided that now was the time to give it a new look, fresh paint and some much needed character. I finally after years of indecision decided on a color, along with a few accent colors.

So today I just want to show what the room was like before in the many stages it has been in, starting  with the first space dilemma I had.

When I first realized I had a problem with the way I organized my room this is what the space looked like. I had a lot of  stuff but no room to actually work on any projects. My kids were younger and wanted to be where I was as well so I needed a place for them to create. My only solution at this time was to bring in a professional organizer. I was quite disappointed with what she came up with but there were a few ideas she had that I liked. The cost of hiring her was too much for me to not get  key  elements to the room. Things like my kids couldn't share the room, my beautiful  hutch computer desk had to go and I couldn't have my sewing machine out all the time. She did however give me some ideas that helped me get past the overwhelming amount of stuff and start visualizing a room to suit my needs. I joined the organizing challenge at Two Peas And A Bucket and went over and over the Scraprack organizing system.


This is how I transformed the room into a workable space. Not only did I find room for my kids but everything is accessible.


In all of these pictures including the final ones that I will show you when I'm done painting the room, my computer desk has stayed in the same spot throughout.


This was a new paper storage that took the place of the large binder system I had previously.

Looking back at these pictures I'm surprised at how many changes the room has gone through over the past 3-4 years. hopefully in the next couple of weeks I can show you the final newly painted space and although many things will be the same there will be a few changes. 

Tuesday, July 26, 2011

more home renos

While my husband is finishing our basement bathroom I thought I would see what was under the blue paint on my counter top, I was very pleased to find this creamy Arborite underneath. So after 8 hours of stripping and scraping paint, 2 cans of paint stripper, I have a new counter top in a much more neutral color. This will tide me over until we can afford to redo the kitchen altogether :)


before


after


Saturday, July 16, 2011

Busy Summer

Wow , so far this summer has been really busy. I have been creating but haven't had the time to post. We also purchased our home that we live in so we have been doing some small reno projects. This was my first project, done from scratch all by myself ( granted I wouldn't let a real carpenter inspect it but its good enough for me).

Storage room/Pantry

Before:


During the process:


I drilled all these holes myself. My arm was ready to fall off!


Cleaned out room with boards ready to assemble:


First part of assembly, no they are not not crooked, just the camera angle. I used a level and measuring tape:)


Shelves, yay!!


Final result, minus the painting of the shelves (I'll do that when I'm feeling ambitious again)